


AWS: Setup Client VPN and DNS host mapping for the VPC Access
Summary:
- Get Certificate with
easyrsa - Creating VPN Client Endpoint
- Associating with VPC
- Define Ingress rule
- Bonus: DNS host name mapping
- Connect with
openvpnor other VPN GUI Client
Step 1: Get Certificate with Easyrsa
First of all, we need to create our own cert signing system called PKI (public key infrastructure).
This can be done with openssl command but much easier with OpenVPN’s easyrsa library.
What we need:
- Root Cert
- Server Cert
- Client Cert
- More Client Cert if we want many client each with different cert
Below is the way to generate cert with easyrsa
$ git clone https://github.com/OpenVPN/easy-rsa.git
$ cd easy-rsa/easyrsa3
$ ./easyrsa init-pki
$ ./easyrsa build-ca nopass
$ ./easyrsa build-server-full server nopass
$ ./easyrsa build-client-full client1.domain.tld nopass
$ aws acm import-certificate \
--certificate fileb://server.crt \
--private-key fileb://server.key \
--certificate-chain fileb://ca.crt
See the last command,
What we upload:
- Root cert
- Server cert
- Private key
The word key chain is 1+2 cert that sign from another cert.
Step 2: Creating VPN Client Endpoint
Go to the console and browse to the VPC → VPC Client Endpoint → Create Endpoint.
Client CIDR must NOT have ANY overlap with your VPC.
This is the pool where client IP will fall into.

Enable DNS Server
If you haven’t yet setup Inbound DNS Server skip this you can edit it later.
Split tunnel VS Full Tunnel
Full tunnel make your traffic no matter where you go e.g. google.com through VPN. Split tunnel make ONLY ip range or host name you define go through VPN.

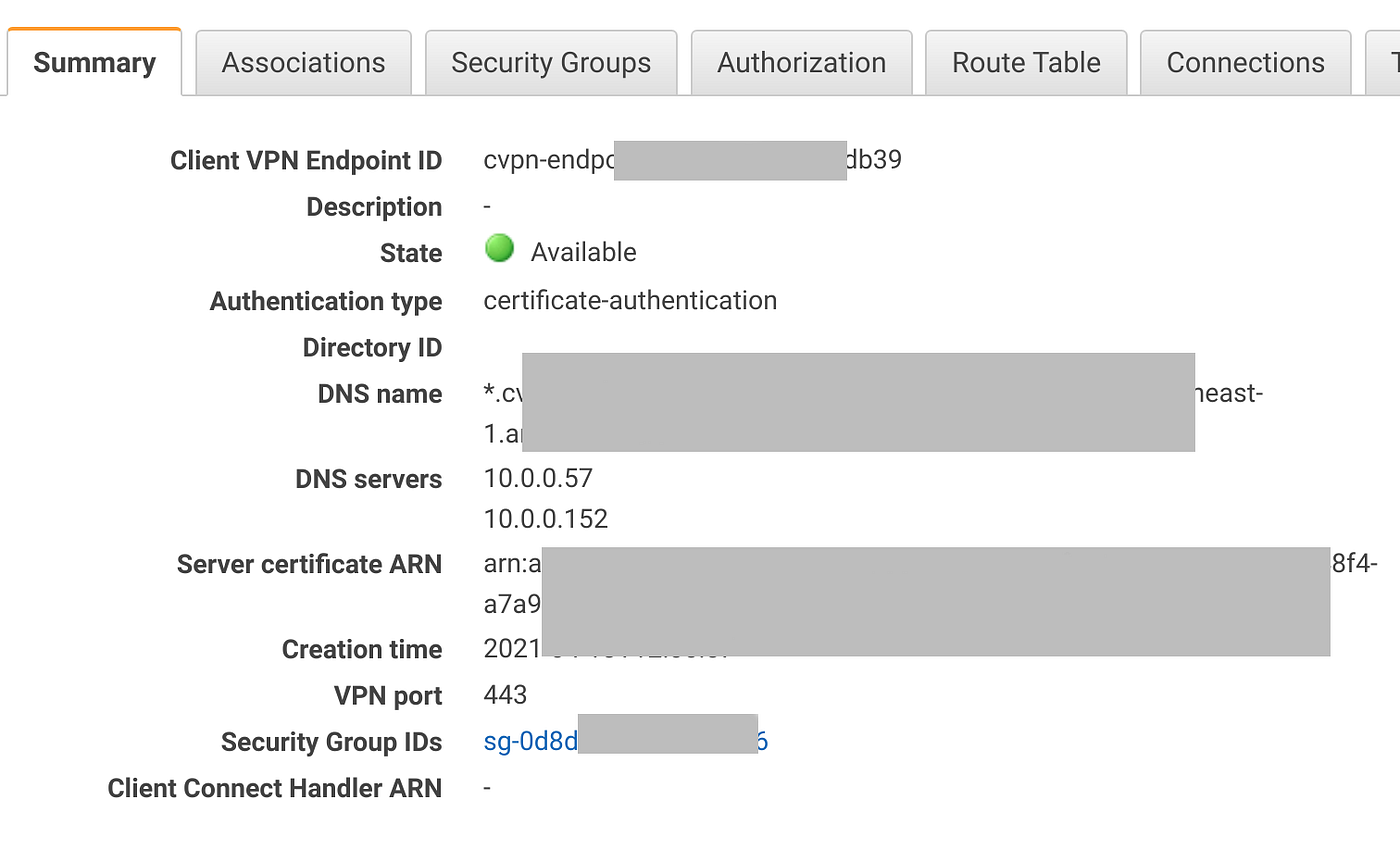
After you’re done creating the Endpoint, you will see the screen similar to image below.
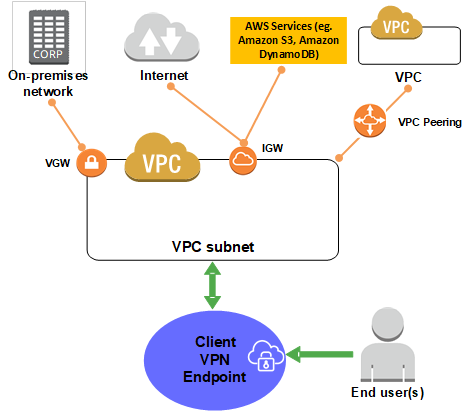
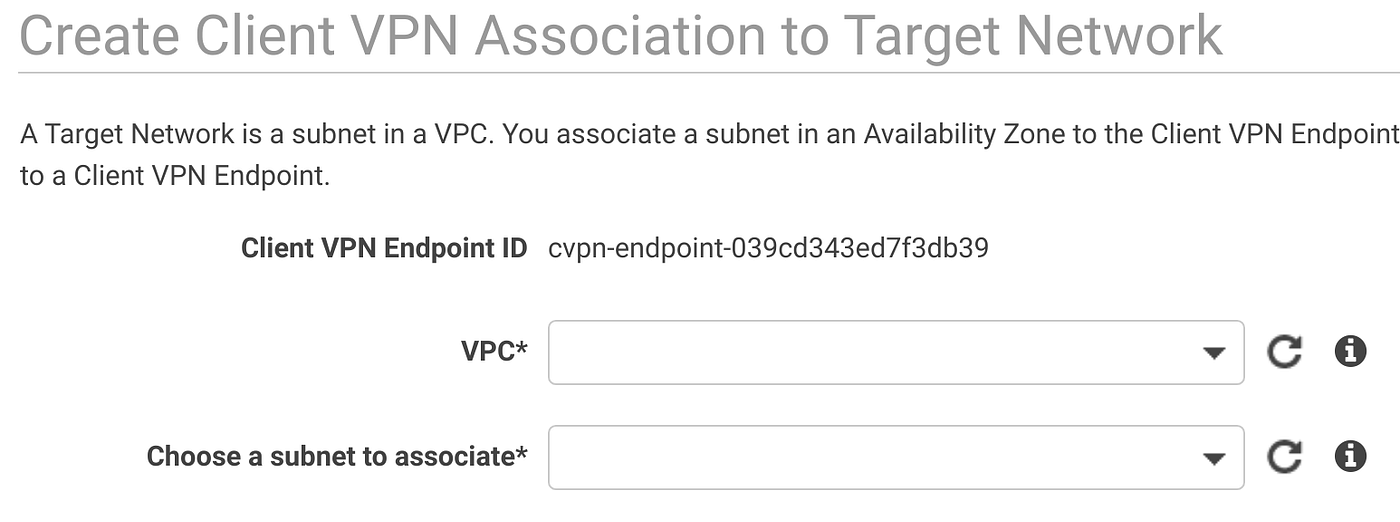
Step 3: Associating with VPC
At this point the status is ‘Pending Association’.
You need to pick the drop-down and associate the VPC and landing subnet to this endpoint.
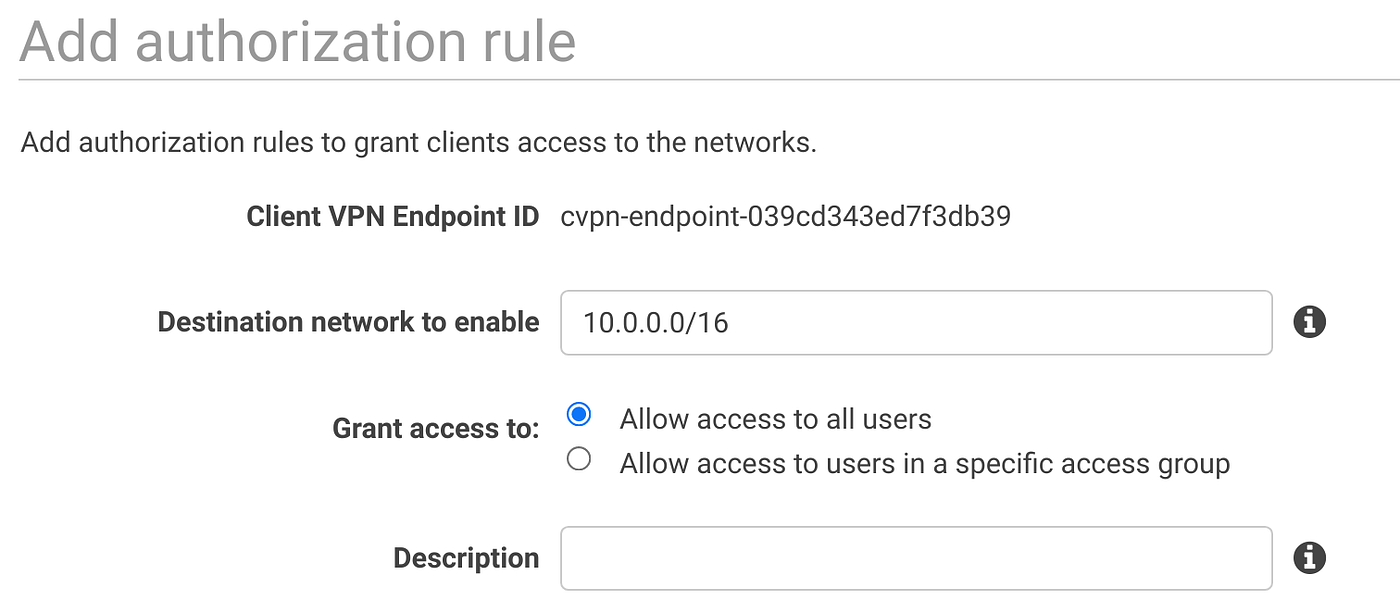
Step 4: Define Ingress rule
The final step is to add ‘Ingress rule’, in my case I authorize the whole network 10.0.0.0/16 and allow all users.
Step 5: DNS host name mapping
Now our VPN is working, but we need to access each machine with IP.
If you don’t want the DNS (host name → IP mapping), you can skip to step 6.
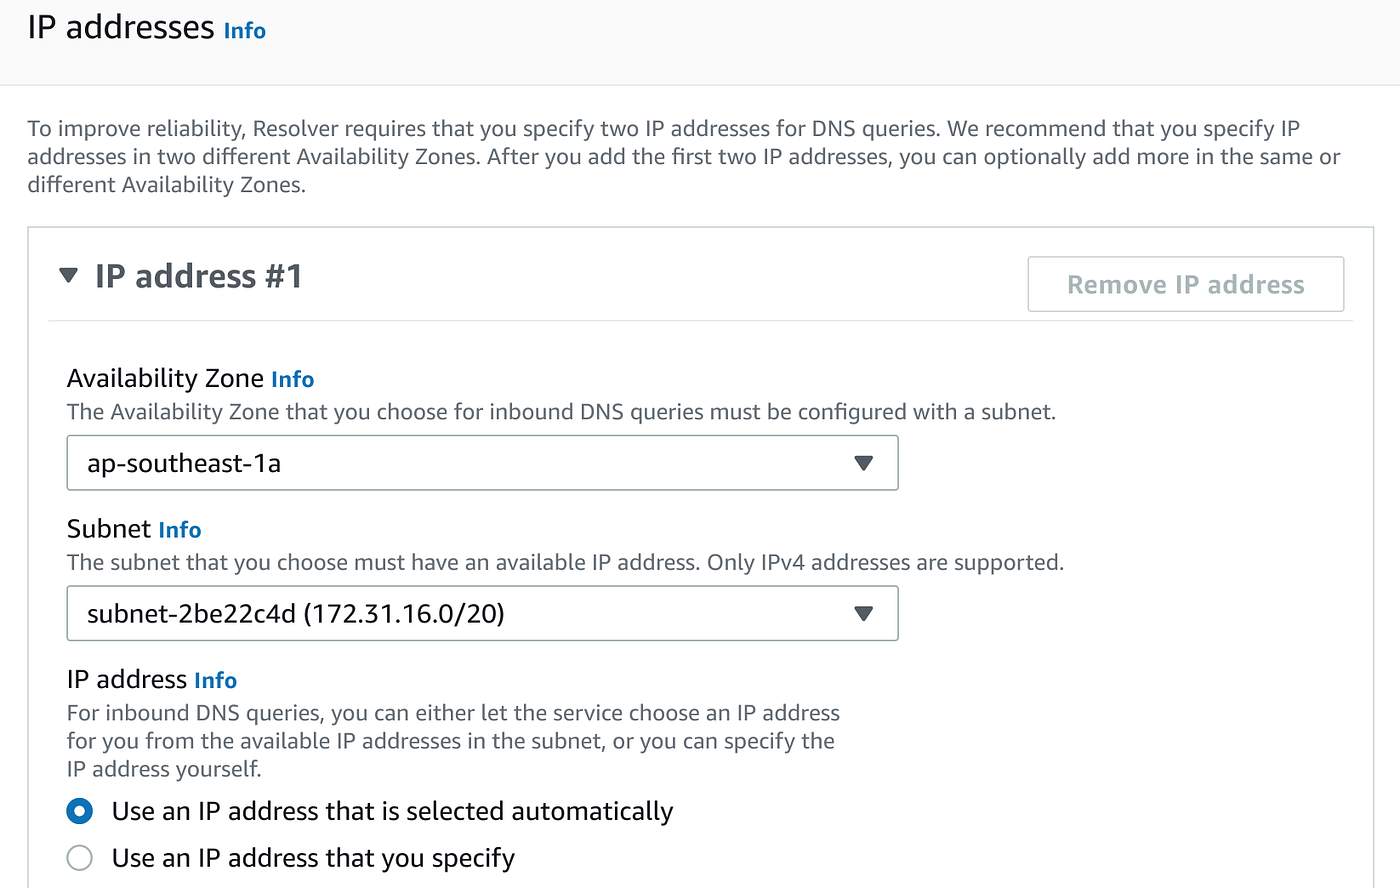
5.1 Setup Inbound DNS
Go to Route 53 → Resolver → Inbound endpoints → Create inbound endpoint
AWS require you to setup at least 2 subnet in 2 AZ (Availability Zone)
Fill in the subnet, this is where the End user query the DNS.
Don’t worry about how. VPN will PUSH this to the client. You will see in the Step 6.
Warning:
Don’t forget to edit your VPN Endpoint to set to this resolver IP. See step 2.
5.2 Setup the private host zone
Route 53 → Hosted zones → Create hosted zone
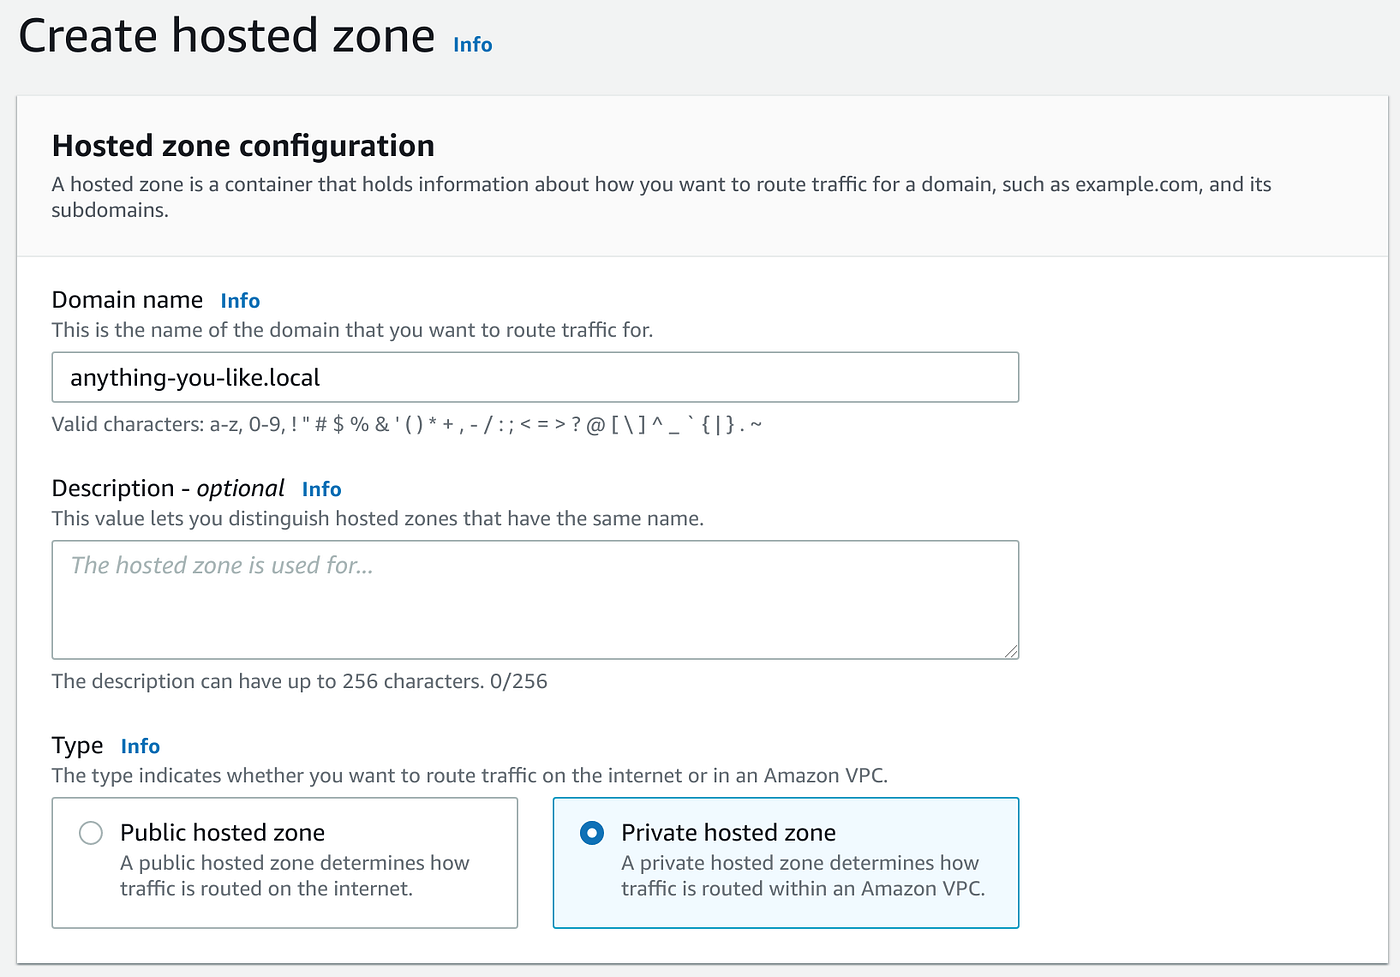
Then associate this with your VPC.
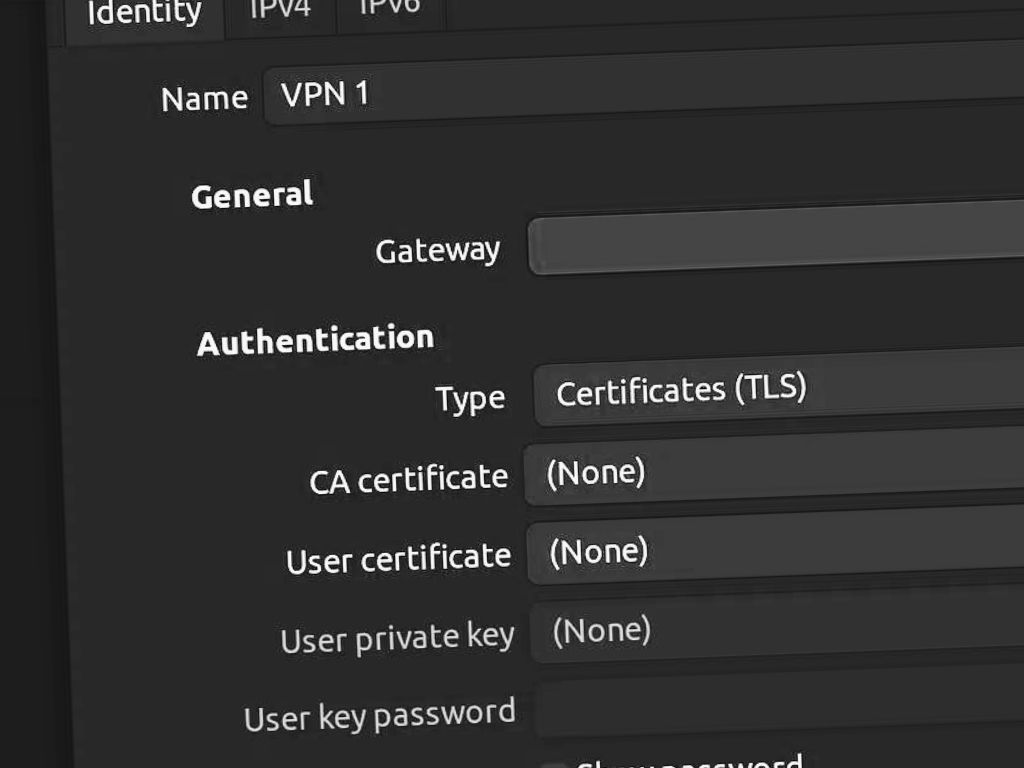
Step 7: Connecting
Download the VPN config file in
VPC console → Client VPN Endpoint (sidebar) → Download Client Configuration
Then you will got .ovpn file.
Sample OVPN File
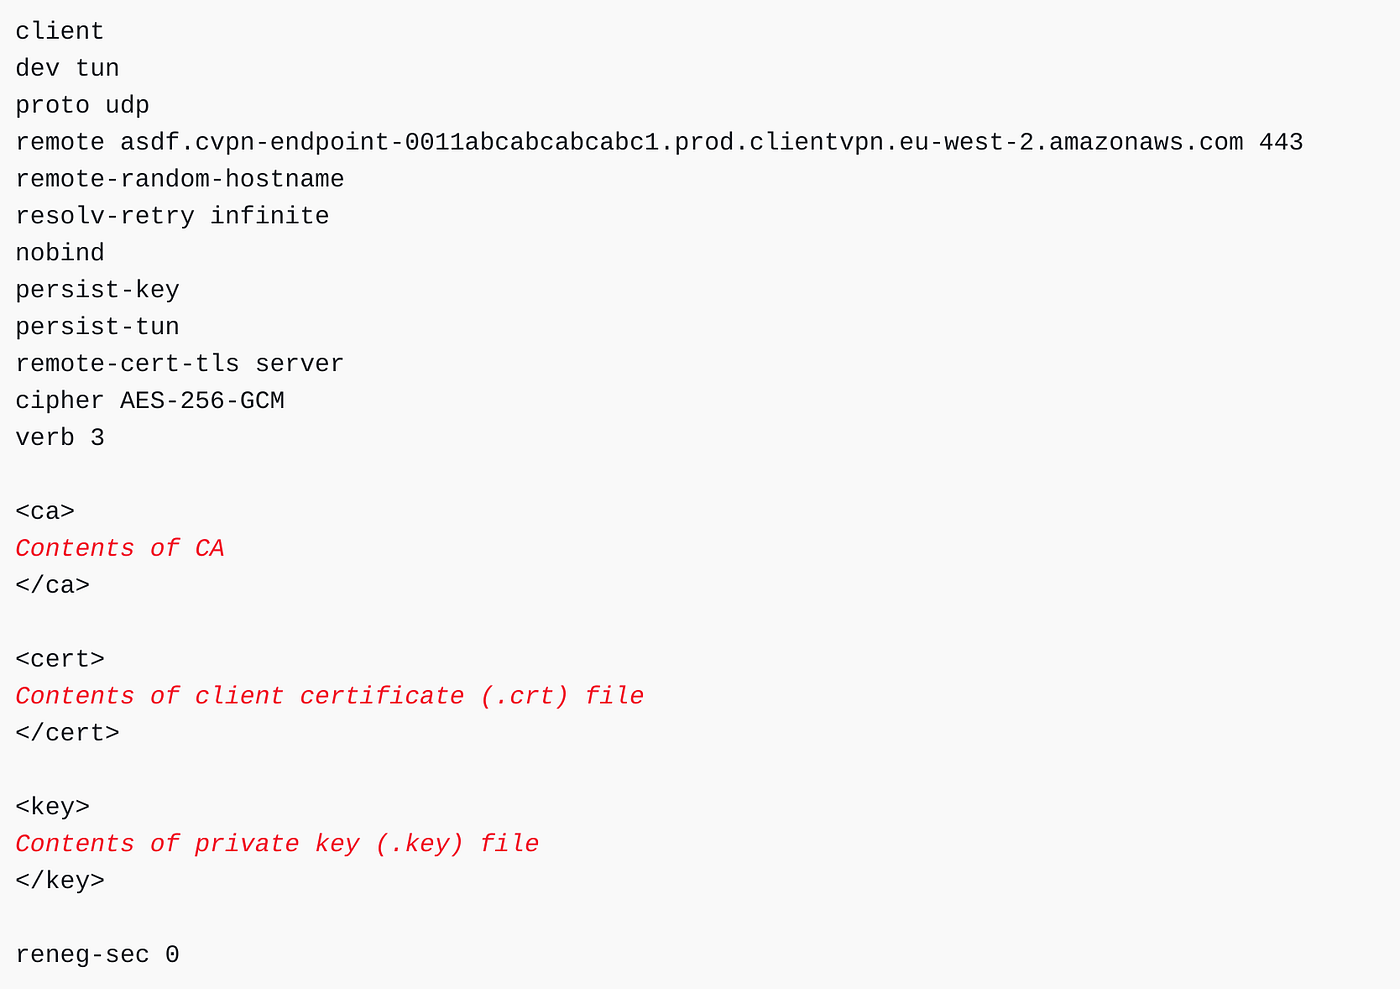
Now you replace the red text with the root cert, CLIENT cert, CLIENT private key generated in Step 1.
sudo openvpn --config ~/path/to/client-config.opvnYou must see the DNS push like this. Your Inbound DNS IP will show here.

and after that you must see the route table modified
ip route listORnetstat -nr

saying the traffic will go through VPN if in 10.0.0.0/16 and else otherwise.
Note on troubleshooting
Sometimes the DNS host is loaded but not correctly set. We have to manually set it with update-resolv-conf command.
script-security 2
...
...
up /etc/openvpn/update-resolv-conf
down /etc/openvpn/update-resolv-conf
Bonus: Alternative Client
If you are on mac, Tunnelbrick is a GUI alternative for this.
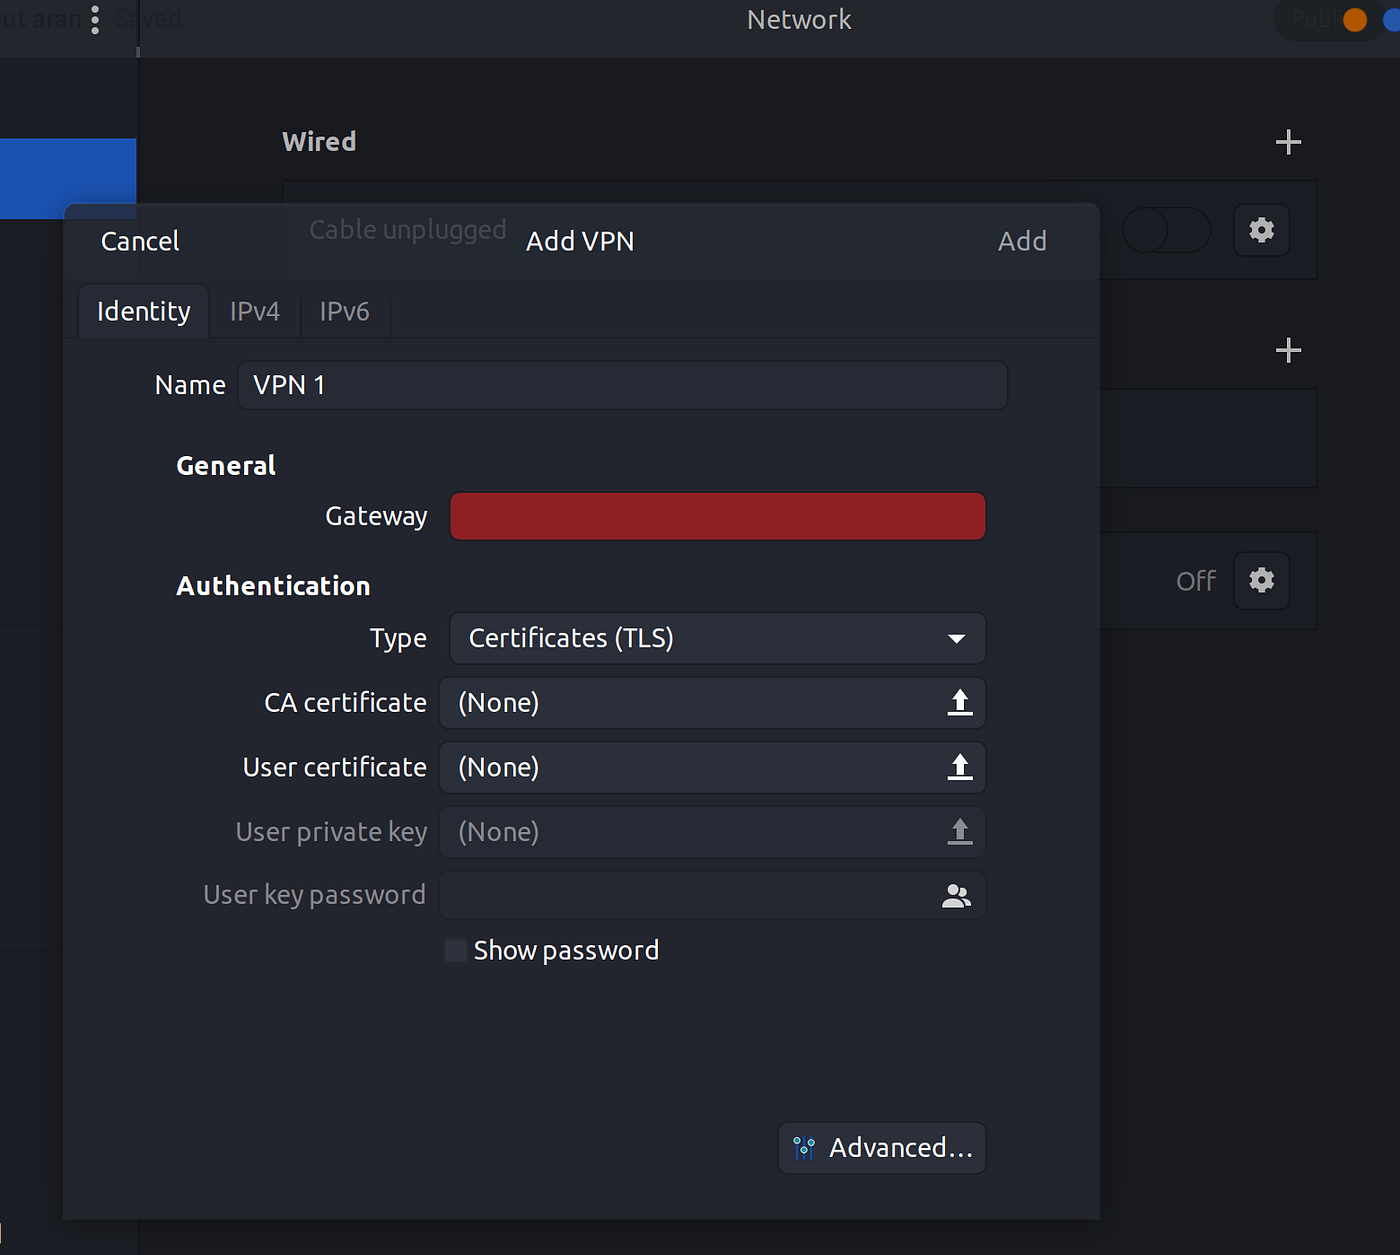
If you are on Ubuntu or other Gnome Linux, OpenVPN is built-in in the network panel.
Here we go.
See you then !


Recommended for you